Showing posts with label classroom decor. Show all posts

Monday, August 4, 2014

Monday Make-It - August 4

I finished my first month of school, whew.  It has been a challenging month, but we made it.  It seems like that I have been doing lots of creating to balance my busy class, but not a lot of projects getting finished.  My hubby says that I have been brain spinning, a lot.  We went to Disneyland, yesterday, for some stress release and I came home with 4 new project ideas.

I am linking up with 4th Grade Frolics to share a couple of the projects that I finished this week.


My classroom is a Disney theme, this year - so you will be seeing a lot of Mickey stuff in my room.


I wanted to add plants to my classroom, but I wanted the pots to be cute.


These pots are on the bigger size, 8 inches (I think).  I found everything that I needed for this project laying around in my house, except for the plants.

I painted the outside of the pot white, first.  Then, painted the red or black on - the red and black paint covers better with a base of white.  The polka dots were made with a polka dot sponge that I got at Hobby Lobby, a while ago.

I sealed them with Mod Podge, because I didn't want to go buy a sealer.  It worked great.

I love the way they turned out.


I went to Home Depot before school to buy the plants.  Apparently, when you buy a plant sometimes they include a free lizard as a bonus.  I was putting one of the plants in the pot, 2 hours after I bought it, and there was a lizard on one of the leaves.  I might have let out a little scream, okay, a big scream.  I am so thankful, it didn't decided to leave the plant when I was driving.


I am loving this next project.  It was so much fun to make.  It is a great way to recycle all the stuff that we having laying around the house.  The only thing that I bought were some extra pompoms.  I made one as a sample and my 20 month old grandson played with it for 15 minutes.  Then, he hid it from me - so he could play with it later, lol.  I am going to make him and the twins a set - I guess I need to drink more water.


I made 12 color sensory bottles.  Red, orange, yellow, green, blue, purple, pink, white, gray, brown, black and rainbow.


The key is to only fill them up a little more than halfway.  If, you fill them all the way then you can't see all the goodies inside.


Here is a sample of what I put in my yellow bottle. The plastic eggs and paper clips I got from the Dollar Store, earlier in the year.  The ribbon was left over from my center leis.  The flowers are from my scrapbooking bin.  I have a huge container of buttons.


I made sorting mats with the color words, so after they played with them - they could sort by color word.


I made a packet of the directions, photos of all the bottles and the sorting mats.  You can find it here for free.


The next make-it was a result of our trip to Disneyland, yesterday.  I was inspired by this.


A whole wall of Jelly Bellies. They started to look like little pompoms.  I discovered that they had different mixes.  My favorite was this.


A Mickey Mouse mix of jelly bellies.  Which led to this.


After, I had my nap - I went to the Party store and bought some confetti packs to add to the bottle.  It didn't take very much, still have a bunch left.  The crystal Mickeys are from a sticker sheet, the kind that is on plastic.  I left it attached to the plastic and cut around them.


My finished Mickey sensory bottles.  My dad saved the little bottles for me, perfect size for the grand kids.

Have a great week, I'm going to make more bottles - Disney style.


Pin It!

Monday, July 14, 2014

Monday Make It - July 14

I am linking up with  Tara for Monday Make it.  I get really sad when these weekly creative sessions are over with.


I have been busy creating a bunch of goodies for my classroom and at home for the grandbabes.  I love it when I can be creative, it helps relax me. First up is something that I made for my grandbabes.


I knitted 3 of these dresses for the younger girls to wear on the 4th of July,  but was only able to get a picture of one of them wearing it since we were gone for the 4th.  The yarn is hand dyed by a friend in Colorado.  Each stripe is a different ball of yarn.


I still need to get a picture of all the girls in the dresses, but I was so tired this weekend from the first week of school - it didn't happen


Next, is something I made for  my TK/Kinder Team with some help from a couple of friends.


I had these red bags, so I asked my new TK partner if she would put every one's name on them.  They are a nice canvas bag.  I added a calendar that I made for each teacher and a custom made cup that I bought from one of the PTA moms.  She personalized each cup.  The girls were thrilled when I passed them out at our first day meetings.  I need to make a couple more for my old First Grade Team, they were a little sad.


I bought the Teacher Planner from The Learning Effect and just used the calendar portion.  I, actually, have two different versions of her planner and love it.


I got permission from Tiffany to make the calendars, since I was prefilling in all the dates.

I filled in dates of all our Team's birthdays, staff meetings, track on and track off dates (we are a year round school), conference dates and meeting dates.  I printed them at home using a thicker paper - 32 pound.  It is not as heavy as cardstock but works well.  I laminated the front and back cover.  Staples spiral bound them for me. It took some time to make them, but they all loved them - so it was worth it.. 


I made something for my classroom.  The rosettes were fun to make, but time consuming.  I love the way they make this board look - so I would make them again.  Our custodian took a picture of the board to show his girlfriend, too cute.


I used 4 sheets of construction paper and a 6 inch circle of scrapbook paper for the middle.  The black one is 20 inches across and the yellow ones are 18.  They are easy to make, it just takes time to score and fold these many rosettes.


This yellow one is 20 inches, just a closer look.  We are doing a Disney theme this year, so you can see a Mickey paper middle.


Then I used my Cricut to cut 5 1/2 inch Mickey heads out of construction paper.  I took pictures the first day of school and we added them to the center of the Mickey head.  I forgot to take a picture, it is adorable. 

 Ignore the mess in front of the board, we were setting up the room.


Here is the board, I am in love with it.  It took some time, but it was so worth it.  You can see I made smaller ones for the opposite sides of the board

I am going to check out what everybody has been busy making this week.  Enjoy your summer, but think of me because I already went back to school.  Sigh.

Pin It!

Sunday, August 5, 2012

I am Ready.....

I think.  Oh my gosh, I am so tired.  I know all of your understand the feeling.  My husband - not so much.  He will call me and ask me if I am still at work, my response is "yup".  It is a good thing he is so far away.  I did manage to take a 2 hour nap today, I sure needed it. 

So here is the first part of my room.  I am really liking the way it turned out. But, I still could spend another week getting it ready.   Thirty kids take up a ton of room, eekk.


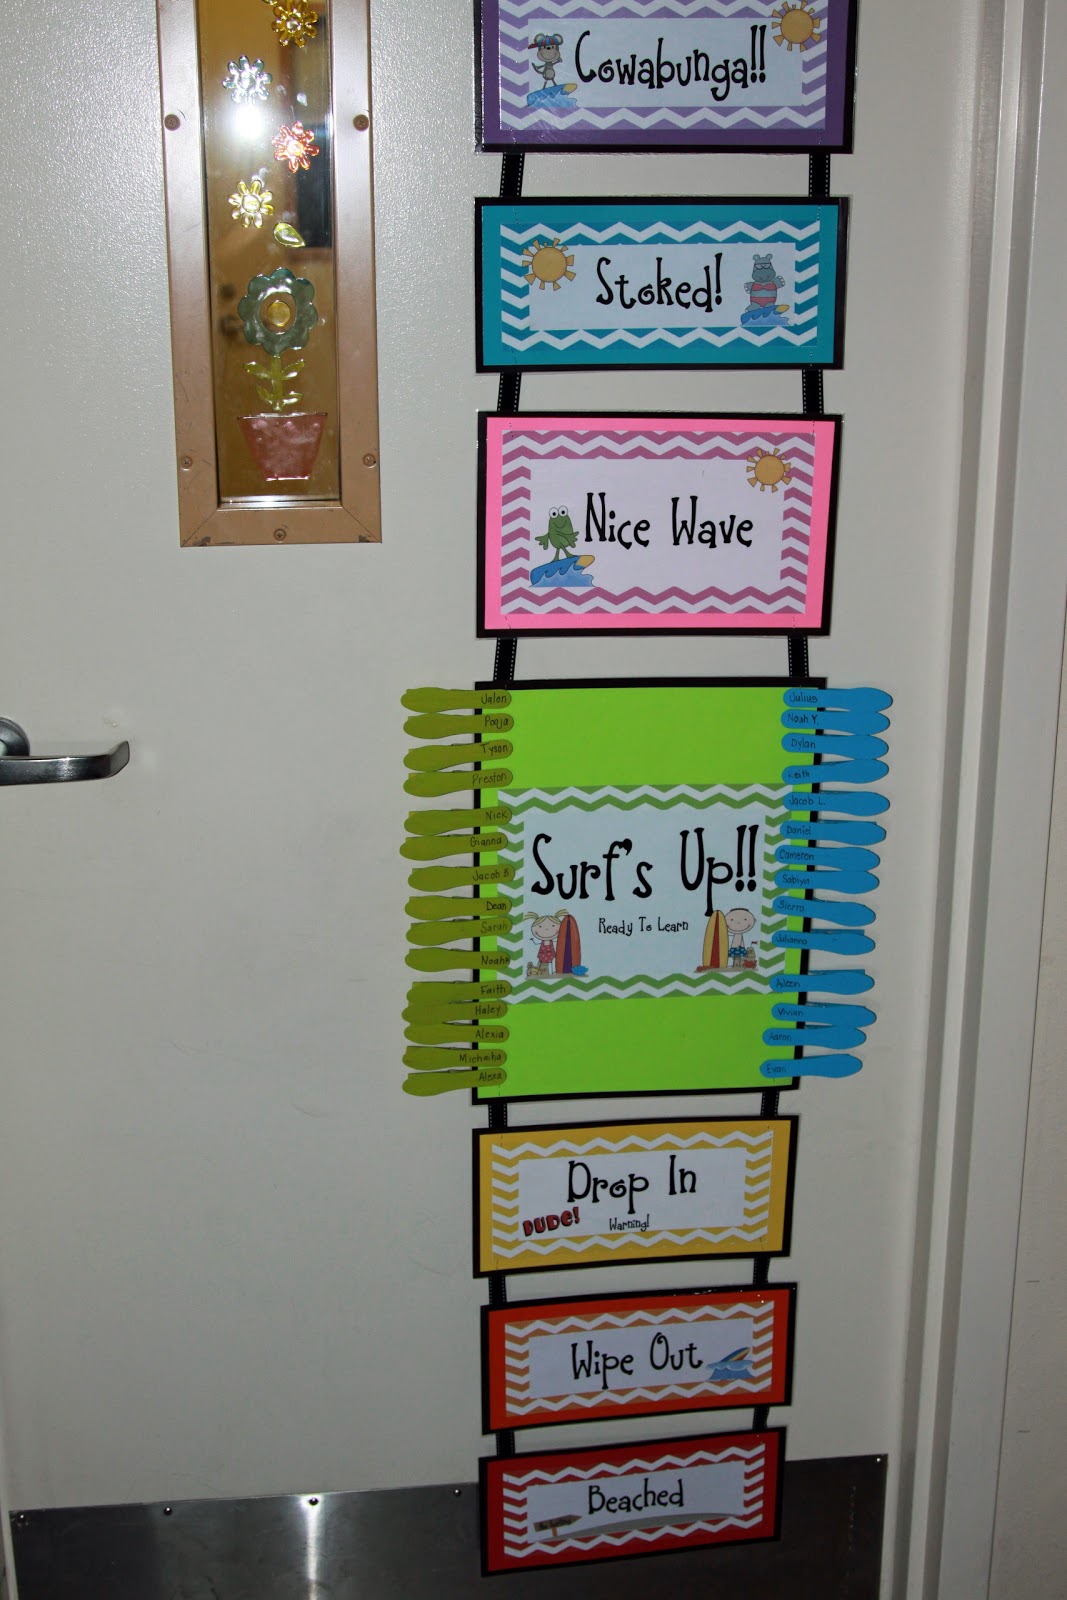
My behavior clip chart from Corinna at Surfin' Through Second.  I started using a clip chart last May and loved it - when I saw Corinna's clip chart I knew I HAD to have it.  Notice where the chevron ends, that is for a normal class size.  Now, see how much I needed to add - geez.  It is almost 6 feet high, but I have a step stool for my darlings.


Next to my door is "How We Go Home" by Michelle at Run! Miss Nelson's Got the Camera.  It was super easy - print, laminate, add ribbon and finished.  She has a bunch of different icons in the packet.

 On the other side of the door.  Class rules, 100 mile chart, my portable word wall (love it), district required posters and those black things are two additional cubbies for my 30 darlings.  I didn't get a good picture of the class rules, they are from Cara Carroll - I will take another picture and link up tomorrow.

Portable word wall is from Tonya at Tonya's Treats for Teachers.  You print out the letters, glue to index cards, laminate, hole punch and they are done.  You add your own grade level appropriate words.  I wrote all my student's names and a few sight words - to start.

My calendar wall - it is not crooked, I was really tired.  The beach pieces are from Jen at The Teacher's Cauldron.  The rest of it I made.  The clocks are from the dollar section at Target.


Above the paper is my beach alphabet and beach numbers by Jen at The Teacher's Cauldron.  The clock numbers are from Clutter-Free Classroom - super easy to use.

Well, that is all for tonight.  I am heading to sleep, I have a hard time sleeping the night before.  I get the "First Grade Jitters", will probably be awake by 3, again.


Pin It!

Monday, July 16, 2012

Monday make it

Update: sorry the pictures are out of order. I am blogging from my iPad with a blogger app and it changes the pictures around.

This is my first time joining in for Monday make it. It looks like so much fun. It is a little harder for me to make things, since I am not at home (still in Hawaii) especially since I have to put it in my suitcase.

I thought I would share my aloha sign that will hang outside of my classroom. Hubby went with me to look for shells one day, he is a good guy. I mod posted wood letters, glued them on my pretty pink board. Then we went looking for small shells and seaglass for the outside. My hubby is such a good guy, he found most of the shells for me

Pin It!

Monday, July 9, 2012

Checking things off

I'm finally getting some school stuff done while I am here. We made another trip to the craft store for some wood frames (they were on sale too). I got them painted, now I need to mod podge them. I found the perfect wood piece for my aloha sign. I painted it a bright pink, it looks brighter than the picture shows. I think I need to add something else to it, but not sure what

Wal-mart has packages of key chains, so I got two packages. When, I got home I remembered that I will have 30 kiddos this year - so I need to go back and get some more. That is dangerous because I always find something else I need. I will probably put sight words on them and hang them on the wall. I saw a really cute sticker sight word book, someplace. I think I will make some of those. EDITED: found the sticker book at firstgraderatlast.blogspot.com. April 1, 2012. She has them listed on her teacher pay teacher store.

I was able to get my calendar pieces together last night, too. They are from theteacherscauldron.blogspot.com. Jen is great. I, also want to make a lot of Corinna's goodies from surfinthroughsecond.blogspot.com, but I don't have a printer over here. It will need to wait until I get home. By then I am sure I will have more ideas.
Pin It!

Saturday, July 7, 2012

Hawaii/beach theme

As you can probably figure out - I am doing a Hawaii/Beach theme with tropical colors. I found jen's beachy theme goodies at Theteacherscauldron.blogspot.com, her stuff is so cute. Then I found Corinna at surfinthroughsecond.blogspot.com. I can't wait to get to a regular computer and printer so I can download all her goodies. Sorry, that I can't provide direct links from my iPad.

I am making some things for my classroom while I am here in Hawaii, so come back and see what I am up to.

I did find this cute duct tape yesterday, not sure what I am going to do with it yet. But when I figure it out - I will be glad that I have 2 rolls of it.
Pin It!

Friday, July 6, 2012

Crafty

I wanted to make a sign to hang outside my classroom, so I went back to the craft store and found some wood letters. Then we headed to the scrapbook store to look for the perfect paper. I was so excited to find this Hawaiian/beach print. I sat on the patio, listening to Hawaiian music while I made my letters. I, seriously want to mod podge everything now -so much fun. Tomorrow I need to go to home depot to find a big piece of wood to glue the letters. I think I might need to make another trip yo the craft store for another project. I love when my mind spins with ideas.
Pin It!